
Pitching a family tent for the first time can seem a little daunting, particularly when you’re faced with a large tent bag, a collection of poles or inflatable beams, numerous pegs and a set of instructions that may not immediately make sense.
However, setting up a family tent doesn’t need to be complicated. With a little preparation, a suitable camping pitch and a methodical approach, even a large family tent can become a comfortable home from home in a relatively short time.
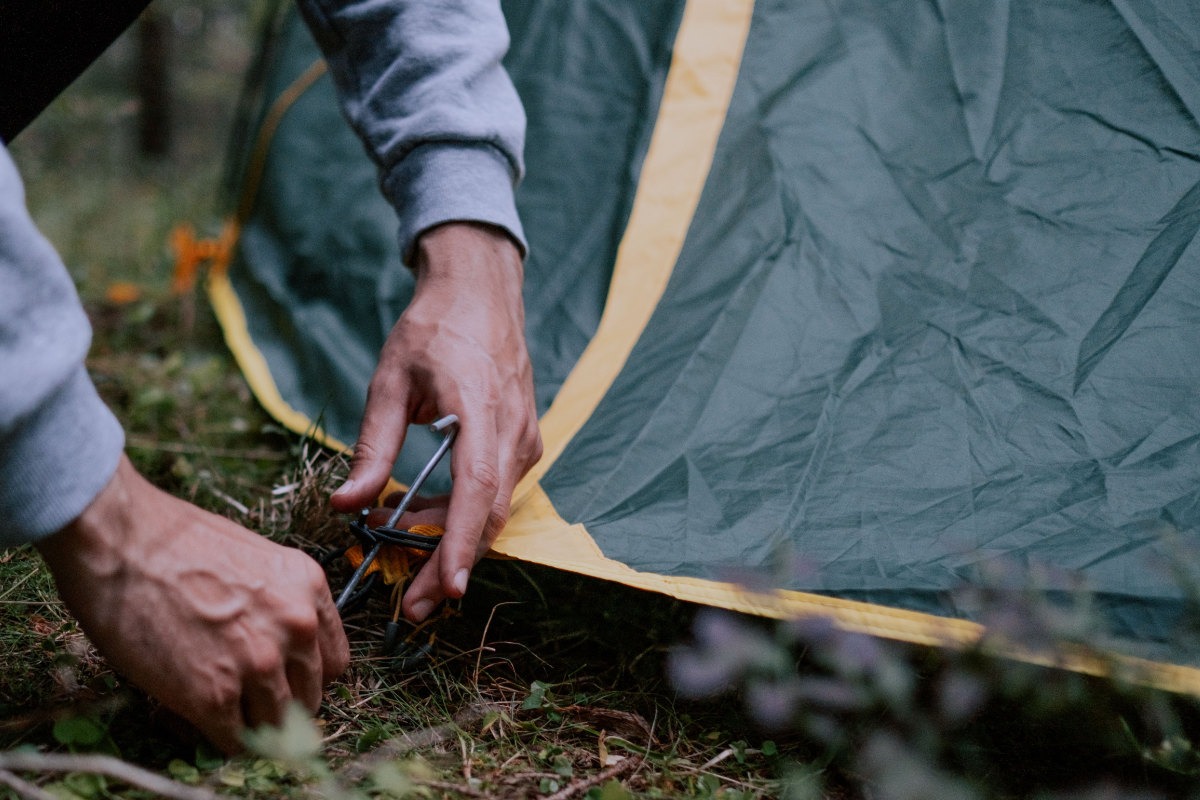
Modern family tents are designed to make camping more accessible, with features such as colour-coded poles, inflatable air beams, sewn-in groundsheets and clearly marked attachment points. Many models can be pitched by two adults, while some smaller family tents can be managed by one experienced camper.
The key to successful tent pitching is understanding how your particular tent is assembled, preparing the ground properly and taking your time rather than rushing.
Whether you’ve purchased your first family tent or you’re returning to camping after several years, this guide explains how to pitch a family tent safely and correctly, from choosing the perfect spot to making the final adjustments before settling in.
We’ll also look at the differences between air tents and traditional pole tents, common pitching mistakes, how to secure your tent in windy conditions and practical tips for making your first family camping trip more enjoyable.
Pitching a Family Tent at a Glance
- Suitable for: First-time campers, families and anyone using a large family tent
- Tent types covered: Air tents, pole tents, tunnel tents and multi-room family tents
- Typical pitching time: Approximately 15–60 minutes, depending on tent design, size, experience and conditions
- People required: Usually one or two adults, although larger tents may benefit from additional help
- Main equipment: Tent, poles or air pump, pegs, mallet, guy lines and manufacturer’s instructions
- Best conditions: Dry weather with light winds
- Most important preparation: Practise pitching your tent before leaving home
- Essential safety consideration: Never pitch beneath unstable trees, in flood-prone areas or too close to open flames
These timings are only a general guide. Some modern inflatable tents can be erected quickly, while larger multi-room tents may take considerably longer, particularly during your first attempt.
Always follow the instructions supplied by your tent manufacturer, as pitching sequences and attachment systems vary between models.
Why Pitching Your Family Tent Correctly Matters
A family tent provides more than somewhere to sleep.
During a camping holiday, it becomes your family’s living space, shelter from the weather and somewhere to store clothing, bedding and other equipment.
A properly pitched tent should remain stable, provide effective weather protection and offer enough internal space for everyone to move around comfortably.
Poor pitching can create several problems, even when the tent itself is well designed.
For example, incorrectly tensioned fabric may collect rainwater, loose guy lines can reduce stability in windy conditions and a poorly positioned groundsheet may allow water to collect beneath the tent.
An uneven pitch can also make sleeping uncomfortable, particularly when using airbeds or camping furniture.
Taking an extra fifteen or twenty minutes to set up your tent properly can make a considerable difference to the comfort and enjoyment of your holiday.
It can also help protect your tent from unnecessary wear and damage.
Before You Leave Home: Practise Pitching Your Tent
One of the best pieces of advice for anyone buying a new family tent is to practise pitching it before arriving at the campsite.
If you have access to a suitable garden or open space, unpack the tent and assemble it at least once before your holiday.
This allows you to become familiar with the different components and understand the correct pitching sequence.
It also provides an opportunity to check that everything is included.
A typical family tent package may contain:
- The main tent body or outer flysheet
- Inner sleeping compartments
- Tent poles or inflatable air beams
- A manual or electric-compatible air pump, where supplied
- Tent pegs
- Guy lines
- A groundsheet or footprint
- Repair patches or spare components
- A storage bag
- Manufacturer’s instructions
Not every tent includes all these items. Some manufacturers sell footprints, additional pegs and repair accessories separately.
Lay everything out and compare the contents with the manufacturer’s packing list.
Check poles for damage, inspect inflatable beams and valves where applicable, and make sure zips and attachment points operate correctly.
Practising at home also helps you estimate how long pitching will take.
That can be particularly useful when planning your arrival time at a campsite.
If you discover a missing component or a problem with the tent, it’s much easier to resolve it before travelling than after arriving at a campsite late in the afternoon.
Choosing the Right Camping Pitch
Before unpacking your tent, spend a few minutes examining the pitch you’ve been allocated.
The position of your tent can have a significant effect on comfort, drainage and protection from the weather.
Look for Level Ground
Choose the flattest available area within your allocated pitch.
A level surface makes it easier to position sleeping equipment and prevents people from sliding towards one side of the tent during the night.
Even a gentle slope can become uncomfortable when sleeping on an airbed.
If the ground is not perfectly level, try to position the sleeping compartments so that your heads are slightly higher than your feet.
Avoid obvious hollows where rainwater may collect.
Check the Ground Surface
Remove small stones, sharp twigs and other loose objects that could damage the groundsheet.
You should also check for hidden holes, exposed roots and uneven patches.
Avoid disturbing established vegetation unnecessarily, particularly on natural or environmentally sensitive campsites.
A tent footprint can provide additional protection against abrasion and sharp objects.
However, it should be positioned correctly beneath the tent rather than extending beyond the outer edges.
Consider Drainage
Good drainage is particularly important when camping in Britain.
Heavy rain can arrive unexpectedly, even during summer.
Avoid pitching at the bottom of a slope, in a natural drainage channel or in a depression where water may collect.
Look at the surrounding ground and consider where rainwater is likely to flow.
A slightly elevated, well-drained pitch is generally preferable to the lowest point of a field.
Never dig drainage trenches around your tent. They damage campsite grounds and are generally prohibited.
Think About Wind Direction
Wind direction can influence how you position your tent.
Where possible, orientate the tent according to the manufacturer’s recommendations, particularly if it has a preferred wind-facing end.
Large family tents can present a considerable surface area to strong winds.
Avoid positioning a broad, unsupported side directly into prevailing winds if the tent’s design recommends a different orientation.
However, don’t rely on hedges or trees as guaranteed wind protection.
Wind direction can change, and sheltered areas may experience unexpected gusts.
Check Your Surroundings
Before pitching, look for potential hazards.
Avoid camping beneath dead branches, unstable trees or anything that could fall onto the tent.
Keep a safe distance from rivers, streams and areas vulnerable to flooding.
Follow campsite rules regarding spacing between tents, vehicles and cooking equipment.
The campsite operator may also have specific requirements concerning fire safety, access routes and the position of tents on individual pitches.
Step 1: Unpack and Organise Your Tent
Once you’ve chosen your pitch, unpack the tent and arrange the components where you can see them.
Keep the tent bag, instructions, spare parts and smaller accessories together so nothing gets lost.
If it’s windy, avoid allowing loose fabric to blow across the campsite.
Place a few suitable items on the tent material to hold it in position while preparing the remaining components, taking care not to damage the fabric.
Separate the pegs, guy lines and poles or pump.
If your tent uses colour-coded poles, arrange them according to their markings.
For inflatable tents, check that the pump is available and that the correct connection is fitted.
Before beginning, read the manufacturer’s instructions to confirm whether the tent is designed to be pitched outer-first, inner-first or as a combined structure.
Many modern family tents use an outer-first system, allowing the main weatherproof shelter to be erected before the sleeping compartments are fitted.
Other designs have pre-attached inner tents, reducing the number of separate assembly stages.
Following the correct sequence is important because trying to assemble components in the wrong order can place unnecessary strain on the fabric, poles or attachment points.
Step 2: Lay Out the Tent in the Correct Position
Spread the main tent body across the chosen pitch.
Identify the front entrance, rear section and sleeping compartments.
Check that the tent is facing the direction you intended.
This is easier to adjust before the tent has been erected.
For a large tunnel tent, lay the fabric out along its full length.
Make sure the material is not twisted or folded underneath itself.
If the tent includes a sewn-in groundsheet, check that it lies flat and that the corners are correctly positioned.
Some tents require initial pegging before the poles or air beams are raised.
Others are designed to be erected first and pegged afterwards.
Follow the manufacturer’s sequence rather than assuming all family tents work in the same way.
At this stage, it’s also worth checking that you have enough space around the tent for guy lines.
A large family tent may require considerably more ground than its advertised floor dimensions suggest.
Step 3: Pitching a Traditional Pole Family Tent
Traditional pole tents use a framework of fibreglass, steel or aluminium poles to support the tent fabric.
The exact system depends on the design.
Some family tents use flexible poles threaded through fabric sleeves, while others use clips or external pole structures.
Assemble the Tent Poles
Lay out the poles and connect the sections carefully.
Most segmented poles are joined by internal elastic shock cord.
Allow each section to fit together properly rather than forcing the connections.
Check that all joints are fully seated before placing the poles under tension.
Partially connected poles can become damaged during pitching.
Insert the Poles
Follow the manufacturer’s instructions and insert each pole into its designated sleeve or attachment points.
Colour-coded systems can make this process easier.
If poles pass through fabric sleeves, feed them carefully and avoid forcing them through resistance.
Where the design requires flexible poles to be pushed through sleeves, pushing gently is generally safer than pulling, which can separate the pole sections.
If a pole becomes stuck, stop and investigate rather than applying additional force.
Raise the Tent
Once the poles are correctly positioned, begin raising the structure according to the manufacturer’s instructions.
Larger family tents are often easier to erect with two adults working together.
One person can support the framework while the other secures the pole ends.
Raise the tent gradually and check that the fabric is not trapped or twisted.
Never force poles into position if the structure appears incorrectly aligned.
Secure the Structure
Once the tent is standing, secure the required pegging points.
Check that the poles are correctly seated and that the outer fabric is reasonably tensioned.
Avoid pulling the material excessively tight.
The aim is to create a stable structure without placing unnecessary strain on seams, zips or pole connections.
Step 4: Pitching an Inflatable Air Tent
Inflatable family tents have become increasingly popular because they replace many traditional poles with air-filled beams.
These beams provide the main supporting structure.
Although the basic pitching principles are similar to those used for pole tents, the inflation process requires particular attention.
Check the Air Valves
Before inflation, locate the air valves and make sure they are correctly positioned.
Some tents use individual inflation points for each beam.
Others have a single inflation system connected to several beams.
Check that the valves are closed or configured correctly for inflation.
Connect the Pump
Attach the pump using the correct connector.
Many inflatable tents include a manual pump, although compatible electric pumps may be available separately.
Always check the manufacturer’s instructions before using an electric pump.
Not every pump is suitable for every tent.
Inflate to the Recommended Pressure
Begin inflating the beams according to the manufacturer’s sequence.
As the beams fill with air, the tent structure gradually begins to rise.
Larger tents may need assistance to lift the fabric into the correct position.
Never exceed the manufacturer’s recommended inflation pressure.
Overinflation can damage air beams, valves and surrounding fabric.
Recommended pressures vary between manufacturers and models, so don’t assume that the pressure used for one tent is suitable for another.
Use a pressure gauge where provided.
Raise and Position the Tent
Once the beams have reached the required pressure, check that the tent is standing correctly.
Straighten any twisted sections and make sure the structure is aligned.
Secure the tent according to the manufacturer’s pegging instructions.
Although inflatable tents can be quicker to erect than traditional pole tents, they still require careful pegging and guy-line adjustment.
Air beams alone do not make a tent secure in windy conditions.
Step 5: Pegging Down Your Family Tent
Correct pegging is one of the most important stages of pitching a family tent.
Pegs help maintain the tent’s shape and secure it against movement caused by wind.
Begin with the main pegging points identified in the manufacturer’s instructions.
Work around the tent methodically, checking that the fabric remains correctly positioned.
Use the Right Pegs
Different ground conditions may require different pegs.
Standard pegs may work well on firm grass, while softer ground may benefit from longer or wider pegs.
Hard or stony ground may require stronger pegs designed for difficult surfaces.
Some campers carry a selection of pegs to accommodate different campsite conditions.
Insert Pegs Correctly
Drive each peg into the ground at an angle that provides a secure hold, following any manufacturer guidance.
The peg should hold the attachment point firmly without damaging the fabric.
Avoid leaving sharp edges exposed where people could trip or injure themselves.
Use a suitable camping mallet rather than forcing pegs into the ground with your foot.
Check the Tent Shape
As you secure the tent, check that the fabric is evenly tensioned.
The walls should be supported without excessive stretching.
Pay particular attention to doors and zips.
If a door becomes difficult to close, the tent may be unevenly tensioned.
Adjust the pegging points before continuing.
Step 6: Securing and Adjusting Guy Lines
Guy lines provide additional stability, particularly in windy conditions.
Large family tents often have numerous guy lines because of their height and surface area.
Every structural guy line specified by the manufacturer should be secured correctly.
Extend the Guy Lines
Unwind the lines and position them according to the tent’s design.
Avoid pulling them too tightly at first.
Secure the pegs and gradually adjust the tension.
Maintain Even Tension
Guy lines should be firm enough to support the tent without distorting its shape.
Overtightening can place unnecessary strain on seams and attachment points.
Loose lines may allow excessive movement during windy conditions.
Work around the tent and make small adjustments until the structure is stable.
Reduce Trip Hazards
Guy lines can be difficult to see, particularly after dark.
Brightly coloured lines or reflective attachments can help make them more visible.
Keep access routes clear and explain to children where the lines are positioned.
Avoid running guy lines across shared campsite pathways.
Step 7: Check the Groundsheet and Sleeping Compartments
Once the main tent structure is secure, check the groundsheet and sleeping areas.
Many modern family tents include sewn-in groundsheets, which provide a continuous barrier between the interior and the ground.
Make sure the groundsheet is lying correctly and isn’t excessively stretched.
If the tent has separate inner sleeping compartments, attach them according to the manufacturer’s instructions.
Check that all clips, toggles and attachment points are secure.
Inner tents should generally hang freely without being pulled tightly against the outer flysheet.
The gap between the inner and outer layers helps reduce contact with condensation and allows the tent’s ventilation system to work as intended.
Position Bedroom Dividers
Some family tents include removable bedroom dividers.
These can create separate sleeping spaces for adults and children.
Decide whether you want individual compartments or one larger sleeping area.
Make sure dividers are correctly attached and don’t obstruct ventilation openings.
Check the Doors
Open and close the bedroom and main entrance zips.
They should operate smoothly without excessive tension.
If a zip feels strained, check the tent’s pegging and fabric alignment before using it repeatedly.
Step 8: Arrange Your Family Tent Interior
Once the tent is fully pitched, you can begin arranging the interior.
A little organisation at this stage can make the rest of the camping holiday considerably more comfortable.
Start by positioning sleeping equipment.
Airbeds, sleeping mats and camp beds should fit comfortably within the sleeping compartments without placing unnecessary pressure on the tent walls.
Avoid pushing bedding tightly against the outer fabric.
This can encourage moisture transfer from condensation.
Next, organise clothing, bags and other equipment.
Keep frequently used items somewhere accessible.
For example, waterproof jackets, shoes and torches should be easy to reach without searching through several bags.
If your tent has a separate living area, consider how the family will use it.
A folding table and camping chairs can create a comfortable space for meals, games and relaxing during poor weather.
However, avoid overcrowding the interior.
Leave clear routes between sleeping compartments and exits.
This is particularly important when camping with children.
Step 9: Check Ventilation and Weather Protection
Before settling into your tent, check the ventilation openings.
Good airflow helps reduce condensation and improves comfort.
Modern family tents may include roof vents, mesh panels, adjustable windows and low-level ventilation openings.
Use these features according to the manufacturer’s guidance.
Even during cooler weather, some ventilation is usually beneficial.
Completely sealing a tent can encourage moisture to accumulate inside.
Check the Flysheet
Make sure the outer flysheet is correctly positioned and isn’t touching the inner sleeping compartments unnecessarily.
Check that all required attachment points are secure.
Check Rain Protection
Inspect door covers, storm flaps and other weatherproof features.
Make sure they are positioned correctly.
If rain is expected, check that the groundsheet and any separate footprint are properly arranged.
A footprint extending beyond the tent can collect rainwater and direct it beneath the groundsheet.
Check Drainage Around the Tent
Look at the surrounding ground one final time.
If the pitch is vulnerable to surface water, speak to the campsite operator about moving to a more suitable location.
Do not dig channels or alter the campsite ground.
Step 10: Make a Final Safety Check
Before unpacking everything, walk around the outside of your tent.
Check that:
- All required pegs are secure
- Guy lines are correctly tensioned
- Poles or air beams are properly positioned
- Air beams are inflated to the manufacturer’s specified pressure
- Doors and zips operate smoothly
- Ventilation openings are correctly arranged
- The groundsheet is lying properly
- Access routes are clear
- Cooking equipment is positioned safely outside the tent
This final inspection only takes a few minutes but can prevent problems later.
If the weather changes during your stay, inspect the tent again and make adjustments where necessary.
How to Pitch a Family Tent in Windy Conditions
Pitching a large family tent in strong wind can be difficult and potentially dangerous.
The large fabric panels can catch the wind before the structure is secured.
If strong winds are forecast, consider delaying pitching or asking the campsite operator for advice.
Never attempt to erect a large tent in conditions that exceed the manufacturer’s wind recommendations.
If conditions are suitable for pitching, work carefully and methodically.
Keep loose fabric under control and secure the initial attachment points according to the manufacturer’s instructions.
Having a second adult available can be particularly helpful.
One person can control the tent fabric while the other manages the poles, beams or pegging points.
Avoid leaving the tent partially erected and unsecured.
Once the structure is standing, secure the remaining pegging points and guy lines promptly.
Remember that wind direction can change during the night.
A correctly pitched tent should be secured according to its full design rather than relying only on the side facing the prevailing wind.
If severe weather develops, follow campsite safety advice and be prepared to move to a safer location if necessary.
How to Pitch a Family Tent in the Rain
Camping in Britain means that rain is always a possibility.
Although pitching in dry weather is preferable, it isn’t always practical.
The main objective when pitching in rain is to keep the sleeping compartments and equipment as dry as possible.
If your tent has an outer-first pitching system, erect the weatherproof flysheet before exposing the inner sleeping areas.
Some tents have pre-attached inner compartments that remain protected during pitching.
Keep bedding and clothing inside waterproof bags until the main shelter is secure.
Avoid placing bags directly onto wet ground.
Once the tent is standing, check that water isn’t collecting on the flysheet or around the groundsheet.
Adjust the fabric tension and ventilation according to the manufacturer’s instructions.
Wet conditions can also make pegs more difficult to secure, particularly in soft ground.
Check that each peg has a firm hold.
For more advice about managing wet weather, read our Family Camping in the Rain guide.
Common Family Tent Pitching Mistakes
Even experienced campers occasionally make mistakes when setting up a tent.
Understanding the most common problems can help make the process easier.
Choosing an Uneven Pitch
A sloping or uneven pitch can make sleeping uncomfortable and may affect how the tent sits.
Take time to inspect the ground before unpacking.
Ignoring the Instructions
Different tent designs require different pitching sequences.
Assuming that every tent works in the same way can lead to unnecessary frustration or damage.
Overinflating Air Beams
Inflatable tents must be inflated to the manufacturer’s recommended pressure.
Excessive pressure can damage the beams or valves.
Forcing Tent Poles
Tent poles should fit together and into their attachment points without excessive force.
If something doesn’t align, stop and check the instructions.
Overtightening Guy Lines
Guy lines should provide support without distorting the tent.
Excessive tension can damage fabric or attachment points.
Forgetting Ventilation
Closing every vent may seem sensible during cold weather, but it can increase condensation.
Maintain suitable airflow.
Positioning the Footprint Incorrectly
A footprint that extends beyond the tent can collect rainwater.
Keep it beneath the protected floor area.
Pitching Too Close to Other Tents
Large family tents require additional space for guy lines and access.
Always follow campsite spacing rules.
Rushing the Final Checks
A few minutes spent checking pegs, guy lines, zips and ventilation can prevent problems later.
How Long Does It Take to Pitch a Family Tent?
The time required to pitch a family tent depends on several factors.
These include the tent’s size, design, weather conditions and the experience of the people assembling it.
A relatively simple inflatable family tent may be erected in around fifteen to thirty minutes by someone familiar with the design.
Larger multi-room tents can take considerably longer.
Traditional pole tents may require additional time because of the need to assemble and position multiple poles.
However, an experienced camper may be able to pitch a familiar pole tent more quickly than an unfamiliar air tent.
The manufacturer’s advertised pitching time should be treated as a guide rather than a guarantee.
It may not include arranging bedrooms, securing every guy line or organising the interior.
For your first camping trip, allow more time than you think you’ll need.
Arriving at the campsite during daylight makes the process much easier.
Can One Person Pitch a Family Tent?
Some family tents are designed to be pitched by one person.
This is particularly true of smaller inflatable models with straightforward inflation systems.
However, larger family tents are often easier and safer to erect with two adults.
The size and weight of the fabric can make positioning difficult, especially in windy conditions.
Traditional pole tents may also require one person to support the structure while another secures the poles.
If you expect to pitch your tent alone, consider this when choosing a model.
Look for manufacturer information about the recommended number of people required.
Practising at home is especially important if you plan to camp without assistance.
Air Tents vs Pole Tents: Which Is Easier to Pitch?
Both inflatable and traditional pole tents have advantages.
Air tents eliminate much of the work involved in assembling and threading poles.
For many families, this can make the pitching process more straightforward.
However, air tents still require careful inflation, pegging and guy-line adjustment.
They may also be heavier to transport because of their integrated beam systems.
Pole tents can involve more assembly stages, particularly when several long poles must be threaded through sleeves.
However, many modern pole tents use colour-coded systems that make the process easier.
The best choice depends on the tent’s design, your budget, how frequently you camp and whether you’ll usually have someone available to help.
For a more detailed comparison, read our Air Tents vs Pole Tents guide.
Tips for Pitching a Family Tent with Children
Camping can be a wonderful family experience, and children often enjoy helping to set up the tent.
However, large tents involve poles, pegs, guy lines and other equipment that require care.
Younger children should remain away from the main assembly area while adults raise the structure.
Once the tent is secure, children can help with simple tasks such as arranging sleeping bags, organising clothing and unpacking suitable equipment.
Older children may be able to assist with certain pitching tasks under adult supervision.
Explain the importance of avoiding guy lines and not pulling on tent fabric or poles.
It can also help to give children a small activity while the main tent is being erected.
This allows adults to concentrate on the assembly process without unnecessary distractions.
Once the tent is ready, involve everyone in organising their sleeping space.
Giving children a familiar area for their belongings can help them settle into the camping environment.
For more ideas, explore our Camping with Children guide.
What to Do After Pitching Your Tent
Once your family tent is fully erected, there are a few additional tasks worth completing before relaxing.
Check that everyone knows how to open the main doors and locate the exits.
Place a torch somewhere accessible.
Keep shoes and waterproof clothing close to the entrance, particularly if rain is forecast.
Arrange food and cooking equipment in accordance with campsite rules.
Never use barbecues, charcoal burners, camping stoves or other fuel-burning cooking equipment inside a tent or enclosed porch.
These appliances create serious fire and carbon monoxide risks.
Even after a barbecue appears to have cooled, charcoal can continue producing carbon monoxide.
Cooking should take place outdoors in a suitable, well-ventilated location, safely away from tent fabric and entrances.
If you’re using electrical equipment, follow campsite electrical safety requirements and use equipment suitable for outdoor camping.
Finally, take a few minutes to familiarise yourself with the campsite.
Locate the toilets, washing facilities, drinking water points and emergency information.
This is particularly useful when camping with younger children.
How to Keep Your Family Tent Secure During Your Stay
Pitching your tent correctly is only the beginning.
Weather conditions can change throughout a camping holiday, so it’s sensible to check the tent regularly.
Inspect guy lines and pegs each morning, particularly after a windy night.
Check inflatable beams according to the manufacturer’s recommendations.
Air pressure can change as temperatures rise and fall.
However, don’t automatically add air without checking the specified pressure.
Inspect the groundsheet and surrounding area after heavy rainfall.
Make sure water isn’t collecting around the tent.
Keep ventilation openings clear and avoid allowing bedding or furniture to press against the tent walls.
If you notice damage to poles, fabric, seams or air beams, address it promptly using the manufacturer’s recommended repair method.
Regular checks can help prevent minor problems from becoming more serious.
Packing Away Your Tent After Camping
Although this guide focuses on pitching a family tent, packing it away correctly is equally important.
Before dismantling the tent, remove bedding, furniture and other equipment.
Sweep out loose dirt and debris.
If possible, allow the fabric to dry before packing.
However, British weather doesn’t always cooperate.
If you have to pack a wet tent, unpack it again as soon as possible after returning home.
Allow all components to dry thoroughly before long-term storage.
Damp tent fabric can develop mould, unpleasant smells and material damage.
Follow the manufacturer’s instructions when removing poles or deflating air beams.
Avoid forcing components or folding the tent around sharp objects.
For further advice, read our Looking After Your Family Tent guide.
Is Pitching a Family Tent Difficult?
Pitching a family tent is usually much easier once you’ve become familiar with the design.
The first attempt may take longer because you’re learning where the components fit and how the structure is assembled.
However, after a few practice sessions, the process often becomes much more straightforward.
Modern family tents include numerous features designed to simplify pitching, from colour-coded poles to integrated inflatable beams.
The most important factors are preparation, patience and following the manufacturer’s instructions.
Choosing a suitable pitch, securing the tent correctly and checking the final setup can make a significant difference to comfort and stability.
For families new to camping, practising at home is one of the best ways to build confidence.
Final Thoughts: Getting Your Family Tent Ready for a Great Camping Holiday
Learning how to pitch a family tent is an important part of preparing for your first family camping holiday.
Although larger tents may appear complicated when first unpacked, the process becomes manageable when broken down into clear stages.
Start by choosing a suitable pitch and checking the ground conditions.
Lay out the tent carefully, follow the manufacturer’s pitching sequence and take your time when assembling poles or inflating air beams.
Secure the structure with the correct pegs and guy lines, then check the groundsheet, sleeping compartments and ventilation.
Finally, make sure the tent is safe, comfortable and ready for the family to move in.
With a little preparation and practice, pitching your family tent can become a straightforward part of the camping experience rather than something to worry about.
And once the tent is standing, the beds are arranged and everyone has settled in, you can concentrate on what family camping is really about: enjoying the outdoors, spending time together and making memories.
For more practical advice, explore our Family Camping Guides and Advice section, where you’ll find helpful information about choosing a family tent, camping with children, staying comfortable and preparing for your next outdoor adventure.